Friday, March 24, 2017
Exchange Get VirtualDirectory cmdlets take a long time to run in Exchange Server
Exchange Get VirtualDirectory cmdlets take a long time to run in Exchange Server
In a Microsoft Exchange Server environment, you run one of the following cmdlets to obtain the properties of a virtual directory for a server in another site thats connected over a wide area network (WAN):
Get-WebServicesVirtualDirectory
Get-OwaVirtualDirectory
Get-ActiveSyncVirtualDirectory
Get-AutodiscoverVirtualDirectory
Get-EcpVirtualDirectory
Get-PowerShellVirtualDirectory
Get-OABvirtualDirectory
However, the cmdlet takes much longer than expected to run (about 15 minutes).
Workarond:
To work around this issue, use the AdPropertiesOnly switch with the cmdlet in the calls to the IIS metabase.
Example 1
Get-OwaVirtualDirectory -Server Contoso –AdpropertiesOnly
Example 2
Get-OwaVirtualDirectory -Identity "Contosoowa (default Web site)" –AdpropertiesOnly
The ADPropertiesOnlyswitch specifies that only the virtual directory properties that are stored in Active Directory Domain Services (AD DS) are returned.
For more information about ADPropertiesOnly switch, see Get-OwaVirtualDirectory.
Support KB 2896472:
https://support.microsoft.com/en-us/kb/2896472
Available link for download
Fixing Streaks and Lines in Scan Copies and Faxes on Samsung Printer
Fixing Streaks and Lines in Scan Copies and Faxes on Samsung Printer
Fixing Streaks and Lines in Scans, Copies and Faxes on Samsung Printer. If you having a trouble with the samsung printer. When you try to scan, copy or fax, show streaks or vertical lines on the print result. Many ways you can try to fix this problem. In this tutorial video, I want to share my experience, how to resolve this problem. You can try step by step, solutions.
Why this problem can happen;
1. May be, the toner is dirty
2. May be, the ADF scanner glass is dirty
3. May be, the white ADF plastic is dirty
4. May be, the Scanner glass is dirty
5. May be, the white scanner lid is dirt
6. May be, the contact image sensor is broken.
All of possible above, you must to try one by one, to make sure where is your printer problem.
If all solutions you have to try but all of them can not fix your problem, I think the contact image sensor is broken. Learn, how to open samsung printer and replace the contact image sensor.
Good luck.
Available link for download
Tuesday, March 14, 2017
Fix HDCP Compliant display error when watching Netflix Video in Safari on Mac
Fix HDCP Compliant display error when watching Netflix Video in Safari on Mac
 |
| Fix HDCP Compliant display error when watching Netflix |
Software and OS Affected: Safari 8.0 and 9.0 on Yosemite and El Capitan.
Solution: This issue has obviously nothing to do with the Monitor being HDCP compliant because most of the monitor these days are HDCP compliant, still you have to be sure if yours is.My monitor is HDCP compliant (HP ZR30W) and its the only monitor connected to my 2014 MacPro.
As per the Netflix, if you experience the error code S7363-1266-48444350 while watching Netflix videos on your Mac computer, its typically caused by an unsupported monitor or screen or you have Airplay turned on.Follow the steps on the post How to Turn AirPlay Off. Apple only supports playback on internal monitors or through HDCP compatible monitors. Follow the troubleshooting steps below to resolve the issue.
1. Disconnect your computer from your external monitor and try playing a movie or TV show again. If this resolves your issue, its likely that your external monitor or TV does not support HDCP.
2. We have found that using DisplayLink software can cause issues when watching Netflix. Remove the software by following the steps below:
- Select the Finder icon from the Dock at the bottom of the screen.
- Select Applications.
- Drag the DisplayLink app to the Trash.
- Right click the trash icon and select Empty Trash.
- Try Netflix again.
What is Display Link Software?
DisplayLink is a software technology company that developed USB graphics technology,designed to connect computers and displays using USB, Ethernet, and WiFi. DisplayLink lets you quickly and easily connect multiple monitors to your Mac with a simple USB connection. Host software is installed on your Mac to communicate with the DisplayLink device.You can add up to six additional monitors to your PC or four additional monitors to your Mac - you just need one USB graphics adapter for each monitor you want to add.
Remove any software which are used to transfer or convert video such as Supertube HD, AirVideo, Adobe-Air, Aimersoft,AirParrot, etc.,
Real Solution to HDCP Compliant monitor error while watching Netflix on Safari
This all happened due to the enforcement of HTML 5 in Safari.Last year Netflix released video streaming in HTML5 in Safari on Yosemite to safe battery power.Apple implemented the Media Source Extensions (MSE) using their highly optimized video pipeline on OS X. This lets you watch Netflix in buttery smooth 1080p without hogging your CPU or draining your battery. In fact, this allows you to get up to 2 hours longer battery life on a MacBook Air streaming Netflix in 1080p - that’s enough time for one more movie!
Apple also implemented the Encrypted Media Extensions (EME) which provides the content protection needed for premium video services like Netflix.
if you want to use Safari, Enter Netflix and go to your account, then to your profile, then to Playback settings and there, uncheck the bottom option (prefer HTML5 instead of Silverlight), you should be able to play movies again and obviously, you have to have Silverlight in your computer.This will revert to Silverlight and will AirPlay fine in Safari.You just need to make sure the Silverlight plugin is enabled and updated and does not have any issue.
Check if the Silverlight Plugin is enabled
From your Safari menu bar click Safari > Preferences then select the Security tab.
Now click Website Settings to the right of: Internet plug-ins
Select Silverlight on the left then select Allow or Ask from the: When visitng other websites pop up menu on the right.
If you want to use HTML5, just leave the setting for HTML5 on in Netflix and use Chrome, Firefox, etc.
How to fix HDCP Display Error for Netflix
This issue does not occur on all the Mac Machine with Yosemite / El Capitan but limited to some of them. So first of all make sure your softwares and Mac is up to date.If you still have problem follow the below steps.
1. Try allowing Silverlight to run always and also set to run in unsafe mode by following the next steps.
Go to Safari > Preferences > Security > Website Settings (plugins) > Click Silverlight and select Allow Always, then Run in Unsafe Mode - then restart safari and play Netflix and it should work.
2. Start using Chrome or Firefox to watch Netflix.
3. Change your user agent each time you want to use Netflix on Safari
This will trick Netflix into thinking your using one of those browsers the selected user agent belongs to, and will use silverlight plugin.
Safari only sets the user agent for that one tab so none of your other tabs are affected. Its also reset when you close the tab, so if you were to open Netflix in a new tab it would be using the default user agent.So you have to change the user agent each time you want to open Netflix.Here is how you can change the user agent of Safari.
1. First of all Enable Develop Menu in Safari
- Launch Safari, located at /Applications/Safari.
- Open Safaris Preferences by selecting Safari, Preferences from the menu.
- Click the Advanced tab.

Fix HDCP Compliant display error when watching Netflix - Place a check mark next to Show Develop menu in menu bar.
 |
| Fix HDCP Compliant display error when watching Netflix |
3. Try to Load Netflix now and it should be working fine.
Note:- User Agent: The user agent is a string of text the browser sends to the web server hosting the web page. If youve ever visited a web page that proclaimed that Safari wasnt supported, this is how the site knew what browser you were using. In most cases, “not supported” is nonsense, and using this menu item you can change the user agent to mimic one from a different browser. You may be amazed how many times a web page that doesn’t work suddenly does, just by changing the user agent.
Remove any third party hardware attached to the computer like wireless adapter, secondary display or Cinema Display then try to run Netflix.
Incoming Search terms
user agent,safari issue with netflix,netflix show errors on safari 8.0 and 9.0,HDCP error with netflix,netflix display error,HDCP compliant monitor issue with Netflix,error code S7363-1266-48444350 when watching netflix,Fix HDCP Compliant display error when watching Netflix
Available link for download
Saturday, March 11, 2017
Convert FLV to iTunes to Play FLV in iTunes Via Mac El Capitan
Convert FLV to iTunes to Play FLV in iTunes Via Mac El Capitan
When you try to add or import FLV in iTunes, you may meet the issue that iTunes cannot play FLV videos. Like most of people, you would have some awesome FLV files downloaded from online websites like YouTube, Vimeo, VEVO, Dailymotion, etc. And there is a big pssibility that you want to import FLV to iTunes to manage or sync to iPad, iPhone, iPod, etc. In this article, you will learn how to easily and fast change FLV files to iTunes format while keeping the original video quality.
iTune only supports MP4, MOV and M4V formats. If youre beating your head against the wall trying to figure out how to get your flash (flv) videos onto your iTunes, stop! Youre going to give yourself a headache! Thats because FLV is not an iTunes-supported video format. You cant directly import these FLV files to iTunes. However, like most of people, you would have lots of FLV files downloaded from some well-known websites like youtube. And There are a big possibility that you want put FLV to iTunes to manage or sync to iPhone, iPad etc. In this case, you have to perform FLV to iTunes conversion.
Convert FLV to iTunes Supported Video Formats on Mac OS X El Capitan
So in order to import or add FLV to iTunes to play FLV to iTunes successfully, it is a nice choice to convert FLV to iTunes known MP4, MOV, M4V, MP3, ALAC, AIFF with a good FLV to iTunes Converter for Mac. The following article will tell a wonderful way to convert FLV videos to iTunes and to easily solve “FLV iTunes” and “iTunes FLV” problems. Here is the review.
FLV to iTunes Converter have both Mac and PC version. FLV to iTunes Converter for Mac can convert FLV videos to iTunes formats like convert FLV to MP4, convert FLV to MOV, convert FLV to M4V, convert FLV to MP3, convert FLV to AIFF, convert FLV to WAV and more with fastest speed and excellent quality througg your Mac OS X El Capitan.
FLV iTunes Converter is able to batch convert FLV to iTunes 12/11/10 etc. to play FLV in iTunes, play FLV in iPod, play FLV in iPad Air, play FLV in iPhone include play FLV in iPhone 6S, play FLV in Apple TV, play FLV in Apple Watch, play FLV in Apple TV and keep meta info at the same time.
Free download Mac FLV to iTunes Converter


Other Download:
- Pavtube old official address: http://www.pavtube.cn/imedia-converter-mac/
- Cnet Download: http://download.cnet.com/Pavtube-iMedia-Converter/3000-2194_4-76177788.html
Step 1. Load FLV videos
You can drag any FLV file and drop to the program or add them by clicking Load Video button. It allows you to add several video files (including but not limited to AVI, MKV, MPG, TiVo, WMV, etc.) at a time and convert them at one go. If you’d like to combine multiple AVI files to be a single file, you can tick the checkbox “Merge into one file”.

Step 2. Select an iTunes-compatible format
In the “Format” tray, switch to Common Video category and choose MOV, or MP4 as your output format. You can also specify an output folder. Otherwise, the default folder will be used. If you want to sync the converted video to a specific devices like iPhone, iPad, iPod or other devices, you can choose your device model from Apple category. Learn>>Best Video and Audio Formats for iTunes.

Step 3. Start FLV to iTunes conversion
This FLV files to iTunes converter will convert FLV files rapidly, preserving 100% original quality. When finished, the output file is ready for being imported to iTunes for syncing or playing.
Step 4: Import video to iTunes library
After the conversion, start iTunes and click File > Add Files to Library to add the converted FLV files to iTunes library. The FLV to iTunes conversion is downright easy and badly quick. The output videos keep lossless image quality. Now you can put your favorite FLV movies on your iPad/iPhone/iPod and enjoy them on the go without any hassle!
Read More:
- Failed to Edit Videos with iMovie in Mac OS X El Capitan
- Best MP4 Joiner - How to Split or Join MP4 Files
- Stream Local Video on Fire TV with VLC via USB drive
- Copy and Put DVD to MacBook Pro for Traveling Watching
- Stream Blu-ray on ATV 3 via RAID external drive
Available link for download
Monday, February 27, 2017
Fix Base System Device Not Found in Device Manager
Fix Base System Device Not Found in Device Manager


PCIVEN_15AD&DEV_0405&SUBSYS_040515AD&REV_00
PCIVEN_15AD&DEV_0405&SUBSYS_040515AD
PCIVEN_15AD&DEV_0405&CC_030000
PCIVEN_15AD&DEV_0405&CC_0300


Available link for download
Thursday, February 16, 2017
Create a Hidden User Account in Windows 7
Create a Hidden User Account in Windows 7
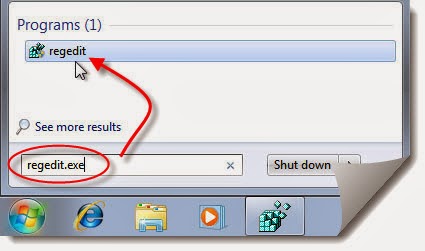
- Run Registry Editor (RegEdit.exe).
- Navigate to the following registry key:HKEY_LOCAL_MACHINESOFTWAREMicrosoftWindows NTCurrentVersionWinlogonSpecialAccountsUserList

- Note: If SpecialAccounts and UserList is not found, create new sub-key and name them accordingly.
- Select UserList, and in the right pane, right click on any blank space, and point to New -> DWORD (32-bit) Value.
- Name the new DWORD registry value name as the exact same name that match the name of the user account to be hidden.For example, if the user ID of the user account is John, the name the registry value as John.
- Double click on DWORD registry value, and set the value data to 0 in oder to hide the account from Welcome Screen.Tip: To display the user account on Welcome Screen again so that it’s visible again, delete the registry entry, or set the value data to 1.
- Exit Registry Editor.
- Log off or restart computer to make the change effective.
Available link for download
Monday, February 13, 2017
Disable Security Messages And Other System Tray Notifications In Windows 7
Disable Security Messages And Other System Tray Notifications In Windows 7
Disable Security Messages And Other System Tray Notifications In Windows 7
Steps to Turn Off Windows Alerts And Notifications In Windows 7 Taskbar
Available link for download
Saturday, February 4, 2017
Fed Ends Zero Rate Era Signals 4 Quarter Point Increases in 2016
Fed Ends Zero Rate Era Signals 4 Quarter Point Increases in 2016
- Fed monitoring `actual and expected progress on inflation
- Officials see economy warranting `only gradual increases

Available link for download
Thursday, February 2, 2017
Download Windows 7 recovery disk in torrent file
Download Windows 7 recovery disk in torrent file

Most of the users are impressed with Microsoft latest operating system Windows 7 thanks to aggressive marketing by Microsoft. Most of the major computer and laptop manufacturer will start providing Windows 7 with new machines.
Unfortunately they do not provide Windows 7 Installation DVD Disc with your purchase. Instead, they bundle what they call a “recovery disc” (that’s if you’re lucky – otherwise you’ll have a recovery partition instead) with your machine and leave it at that.
Without Windows 7 Installation disc it would be impossible for you to recover your crashed Windows 7. Thankfully, Microsoft seems to have realized this problem, and have thankfully made a recovery disc for this purpose.
It contains the contents of the Windows 7 DVD’s “recovery center” Which cannot be used to reinstall or install Windows 7 and just serves as a Windows PE interface to recovering your PC.
Here is Windows 7 Recovery Disc for download that can be used to access a system recovery menu, giving you options of using System Restore, Complete PC Backup, automated system repair, and a command-line prompt for manual advanced recovery.
- Download Windows 7 Recovery Disc (32-bit)
- Download Windows 7 Recovery Disc (64-bit)
Don’t wait until your PC crashes to download a copy! Download and burn your recovery disc today, so that when the time comes, you’ll be ready!
Source: Neosmart.net/blog
Available link for download
Sunday, January 22, 2017
Deleted files in Vista
Deleted files in Vista
Deleted files in Vista,
The next thing to do is to examine the basket. Inside you will find all files that have been deleted in the past few days, weeks or months. If you scroll down the list, you can find the file. What should I do next is click on the file and restore the file to its original position. This is the easiest way to recover deleted files in Windows Vista.
So, if the file is not in the trash? What will you do next? This file is still a place on your hard disk, it is not easy to find. This is due to the fact that the Windows Vista operating system has all the file extensions that make it easy to identify, to delete, and rename the file distribution can be used in hard disk space.
Now you need something more powerful. You should try using data recovery software for searching and restoring files. You can search for a long time and never could have files that they do not see how they can not find deleted.
Take any software for data recovery software can also find files quickly and easily. Files can be recovered, with the extensions that the operating system, which allows you to take positions before being replaced have been removed to complete.
This is a sickening feeling to realize that you have a file you really need to be removed, but do not despair, theres really any way to recover deleted files in Windows Vista.
Recovery in the search for software to recover deleted files, you must make sure that you choose something that has to do the job properly. Fortunately, there is a site that compares the "deleted file recovery software and tell you exactly the best software. Called Bestway and recovery, you can check and restore deleted files by clicking on http://www.bestwayrecovery.com
Available link for download
Saturday, January 21, 2017

Tuesday, January 10, 2017

Fact Why samsung galaxy s7 Released Galaxy On7 Pro and On5 Pro in India
Fact Why samsung galaxy s7 Released Galaxy On7 Pro and On5 Pro in India
Simple Truth Why Samsung announces Galaxy On7 Pro and On5 Pro in India

Indian Users off this Blog, Samsung has finally announced the Pro versions of last year’s Galaxy On5 and Galaxy On7 in India. While the new “Pro” variants are arguably just the 2016 updates to the 2015 originals, the new versions are now called the Galaxy On5 Pro and the Galaxy On7 Pro (we’ll just have to wait until October to see if we also get a On5 (2016) and On7 (2016)). Both faux-leather backed devices are exclusive to Amazon India and run Android 6.0 Marshmallow at launch.
SPEC
Down to the specs: the Galaxy On7 Pro specs include- 5.5-inch HD TFT display,
- quad-core Snapdragon 410 SoC clocked at 1.2 GHz (with Adreno 306 GPU),
- 2 GB of RAM, 16 GB internal storage, microSD expansion,
- 13 MP f/2.2 main camera, 5 MP f/2.2 front-facing camera,
- 3,000 mAh battery and dual-SIM capabilities.
- The Galaxy On7 Pro price is Rs. 11,190 (~$167). As the time of this Post.
Also
There are also some launch deals to check out. You can save up to Rs. 6,000 off a Thomas Cook holiday or there’s two exclusive Idea plans for data and calls. One gets you 3GB of data, 300 minutes and 300 included SMS for Rs. 494 and the second gets you 2 GB of data, 200 minutes and 200 SMS for Rs. 343.Both the Galaxy On5 Pro and On7 Pro feature “Make for India” considerations like S bike mode and Ultra Data Saving mode.
Wee think this is the Most ow-some Offer for our Indian Brothers What do you think??

Available link for download
Sunday, December 25, 2016
Copy A DVD In Multiple Languages Into A Single File
Copy A DVD In Multiple Languages Into A Single File
Best DVD Ripper to rip DVD in multiple subtitles into one single file
Pavtube ByteCopy is just the DVD Ripper I want to recommend you guys. It can fulfill all the work about DVD ripping. Learn the detailed function below:
1. Break down all the encryption in Blu-ray/DVD discs, like CSS, RC, UOPs, Region codes and Sony ARccOS.
2. Rip Blu-ray/DVD to lossless MKV keeping multiple subtitle/audio track and all chapter markers so that you can switch to any subtitle/audio track when watching the DVD movies.
3. Uncheck the subtitle/audio tracks to just keep one single subtitle/audio track in Blu-ray/DVD ripping process.
3. Extract srt subtitle from Blu-ray/DVD movies
4. Backup Blu-ray/DVD movies with forced subtitle where the subtitles are displayed only when the characters speak a foreign or alien language, or a sign, flag, or other text in a scene is not translated in the localization and dubbing process.
5. Convert Blu-ray/DVD to H.265, M3U8, MP4, MOV, MKV, M4V,etc with desired subtitle
Learn >> More reasons to chose Pavtube ByteCopy
Free download and install:


Other Download:
- Pavtube old official address: http://www.pavtube.cn/bytecopy/
- Cnet Download: http://download.cnet.com/Pavtube-ByteCopy/3000-7970_4-76158512.html
In-depth Tutorial to rip DVD in multiple subtitles into a single one
Step 1: Import DVD movies
click “Load from disc” to add the DVD movies to the program. You can preview the movie in right window.

Step 2: Choose output format
Navigate to “Format” > “Multi-track Video” > “Lossless/encoded Multi-track MKV(*.MKV)”

Step 3: Uncheck extra subtitles
Click “Settings” to choose “Subtitle”. Here, you can see all the subtitle tracks. You just need to uncheck the subtitle tracks you want and only preserve one subtitle then you can get a DVD rip with a single subtitle track.

Step 4: Start to rip DVD with only one single subtitle track
Back to the UI and hit on “Convert” to start to re-encode DVD with multiple subtitles into one single file.
Check the DVD rip in your VLC and it should displays only one language subtitle. But for those who are learning a foreign language, preserving the mother tongue and the foreign language subtitles will be a better idea.
In addition, if you also love to burn your Christmas video, birthday party recordings to DVD, there is a software bundle which offers you Pavtube ByteCopy and DVD burning software at a lower price:
ByteCopy($42)+DVD Creator($35)=$44.9, saving $32.1. That means you can get a professional DVD burning software only pay more $2.9.
Read More:
- Convert MKV to 3D MP4 for Playing on HTC Vive
- Add SRT Subtitles to AVI File on Windows 10/Mac El Capitan
- How to Add/Import Movie Subtitles to DVD Video
- Top Way of Copy Blu-ray/DVD to MKV with Subtitle for NAS
- Subtitle adding, Add srt, ass, ssa subtitles to MP4 video
Available link for download
Thursday, December 22, 2016
Explorer exe not working task manager constantly not responding even when in safe mode
Explorer exe not working task manager constantly not responding even when in safe mode
You might want to try running sfc /scannow to see if that helps.
"Try these to clear corruption and repair/replace damaged/missing system
Start - type this in Search Box -> COMMAND find at top and RIGHT CLICK - RUN AS
Enter this at the prompt - sfc /scannow"
Look for help here

Available link for download
Tuesday, December 20, 2016
Fast Solution to Problem Automatic Save A multiple times a Backup Copy of A Workbook in Excel 2007
Fast Solution to Problem Automatic Save A multiple times a Backup Copy of A Workbook in Excel 2007
Automatic Save A multiple times a Backup Copy of A Workbook in Excel 2007
When I activate the option of an Automatic Backup, I need to have multiples Backup of the same File, like a version of the File.
each time that I save the File this put a new Backup of the File, until I reach the magic number (ie.
10)
This is a facility that I need because multiples user aceess the same File and do some Changes that mabe are critical in the process.
Tks.
Keys to the Problem Automatic Save A multiple times a Backup Copy of A Workbook in Excel 2007
Download Error Fixer for Free Now
I do exactly that using the before save event.
Follow these instructions, and you will always have the 10 newest copies saved in a sub folder.
First, create a folder named "Backup Folder" in the folder with your workbook (so that it is a sub folder - and note that the code will only work with one workbook in the master folder unless you modify the code a bit).
Then copy this code into the ThisWorkbooks codemodule:
****************
Private Sub Workbook_BeforeSave(ByVal SaveAsUI As Boolean, Cancel As Boolean)
Dim Files2Keep As Integer
With Application
.DisplayAlerts = False
.EnableEvents = False
Files2Keep = 10
ThisWorkbook.SaveCopyAs ThisWorkbook.Path & "Backup Folder" & _
.WorksheetFunction.Substitute(ThisWorkbook.Name, ".xls", "") & _
" BU " & Format(Now(), "yyyy-mm-dd hh-mm-ss") & ".xls"
CleanUpBackups Files2Keep
.DisplayAlerts = True
.EnableEvents = True
End With
End Sub
******************
Then copy this code into a regular codemodule, and create a reference to Microsoft Scripting Runtime:
Sub CleanUpBackups(Files2Keep As Integer)
Routine to get rid of older backup files
Dim OldestFile As String
Dim OldestDate As Date
Dim objFSO As Scripting.FileSystemObject
Dim objFolder As Scripting.Folder
Dim intFolderSize As Integer
Dim colFiles As Scripting.Files
Dim objFile As Scripting.File
Dim strFile As String
Dim dtmFileDate As Date
OldestFile = ""
OldestDate = Now
Set objFSO = CreateObject("Scripting.FileSystemObject")
Set objFolder = objFSO.GetFolder(ThisWorkbook.Path & "Backup Folder")
intFolderSize = objFolder.Files.Count
While intFolderSize > Files2Keep
Set colFiles = objFolder.Files
For Each objFile In colFiles
strFile = objFile.Path
dtmFileDate = objFile.DateCreated
If dtmFileDate < OldestDate Then
OldestDate = dtmFileDate
OldestFile = strFile
End If
Next
objFSO.DeleteFile (OldestFile)
intFolderSize = objFolder.Files.Count
OldestFile = ""
OldestDate = Now
Wend
End Sub
HTH, Bernie
Running System Update Readiness Command
On running the System Update readiness Command, it will Detect & Replace Incorrect Registry data with the Correct one. Which may ultimately Solve Automatic Save A multiple times a Backup Copy of A Workbook in Excel 2007 in Windows.
- Open CMD as Administrator by Simply Right Clicking on Start button > Command Prompt (Admin).
- Now Type or Copy paste "DISM.exe /Online /Cleanup-image /Scanhealth" and hit Enter,
- Now again Type or Copy paste this "DISM.exe /Online /Cleanup-image /Restorehealth" and hit Enter.
- Close the Command Prompt Window because we are done.
Try and see if you still get the same error Automatic Save A multiple times a Backup Copy of A Workbook in Excel 2007 in your Windows.
Note: You may be prompted to enter your administrators password when you try to execute certain system tasks!
Recommended Method to Repair the Problem: Automatic Save A multiple times a Backup Copy of A Workbook in Excel 2007:


How to Fix Automatic Save A multiple times a Backup Copy of A Workbook in Excel 2007 with SmartPCFixer?
1. Click the button to download SmartPCFixer . Install it on your system. Run it, and it will scan your computer. The errors will be shown in the scan result.

2. After the scan is done, you can see the errors and problems which need to be repaired.

3. The Repair part is done, the speed of your computer will be much higher than before and the errors have been removed. You can also use other functions in this software. Like dll downloading, junk file cleaning and print spooler error repair.

Related: AMD Radeon HD 7800M Win8 not working [Anwsered],I can access the internet, get on facebook and get to hotmail, but I cant play games on facebook and I cant open or respond to my e-mails,I keep getting this Media Player error when I log on my computer. [Anwsered],[Anwsered] System Hanging on shutdown and restart,Unable to get the Vlookup property of the WorksheetFunction class,Solution to Error: Error: "0x81000032 make sure the C: drive is online and set to NTFS" when trying to backup to external hard drive.
,Troubleshoot:External Hard Drive not listed in Windows 7 backup wizard Error
,Im always being signed off so annoying Tech Support
,Solution to Problem: Impossible to use Internet Explorer! I keep getting the same error message every time i try to use IE.
,Solution to Problem: Referencing data in another file
,Troubleshoot:Error: "0x81000032 make sure the C: drive is online and set to NTFS" when trying to backup to external hard drive. Error,External Hard Drive not listed in Windows 7 backup wizard Tech Support,Tech Support: Im always being signed off so annoying,Solution to Problem: Impossible to use Internet Explorer! I keep getting the same error message every time i try to use IE.,Referencing data in Access using Excel [Anwsered],Need Best Way To Present Data [Anwsered],Same question but for windows 7 home edition,sometimes fullscreen wont activate [Solved],Solution to Error: We bought a new computer with windows 7 and it is constantly freezing. How do we fix this?,Solution to Error: Windows 8 update crash (2013-07-22)
Read More: Tech Support: Backup Failed Error Codes 0x80070005 AND 0x8078008A.,Solution to Error: Auto Create Hyperlinks,Troubleshooting:Avg. Disk Queue Length is 2. The disk may be at its maxium transfer capacity due to throughput and disk seeks Error,Back up and restore centre - unable to back up to Iomega external hard drive - getting error code 0x81000008 Tech Support,backup set up screen will not show external USB connected HD networked on 2nd PC Tech Support,application not found error,any problems in a team where one has Windows XP and the other has Windows 7?,Application/Object-Defined Error,An Excel formula question where hours are totalled and cumulating,Anyone know the hardware email?
Available link for download