Showing posts with label creating. Show all posts
Showing posts with label creating. Show all posts
Thursday, February 16, 2017
Creating Online Business Profiles
Creating Online Business Profiles

Business profiles are all about identity but in this case, it is the digital identity since it is online. Business profiles define what potential employers are going to have as their first impression of you. Getting this information right strongly impacts the likeliness of winning a job or completing a sale as compared to someone who appears as a ‘joker’ in the eyes of the employer. Depending on your achievements, the client should view all the aspects indicating you are the right organization for the job.
You may have two business profiles so that each has achievements that are related to its own specific job-line. The other profile could have the achievements for another job-line. This helps in separating your various capabilities and not to appear as a jack-of-all-trades in the eyes of the potential employer or client.
Factors to consider when creating a business profile:
Several factors have to be considered in creating that professional look online.
- First and foremost, your name describes you. This goes hand in hand with the job you are applying for. You should aim to provide a title that is hand in hand with the job or at a lower level.
- Only present truthful information on your business profile. Clients are known to often take random sections of information, or claims of your achievements and countercheck them. Having wrong information or unverifiable information on your business profile may not help you in such a case.
- You should also include a referee or two who are well aware of your achievements and your technical experience. It is good to have such referees coming from your field of operations or expertise. It defeats the purpose if you are in the construction business nad you have a referee in the medical field.
- A client has to have a means of direct contact. It is therefore wise to add your phone number in the profile. Clients may want to talk directly to those applying for a job so as to determine who is available. Social media can also be incorporated. Not all social media sites are advisable. Limit yourself to the professional oriented sites such as LinkedIn. This helps identify how well connected you are. It also helps the client to contact you in a more private manner unlike the ‘noisy’ social media platforms such as Facebook and Twitter.
- Pages like Facebook and Twitter are not advisable to be included since they don’t reflect much on your professional life. However, customers may want to snoop around on your business life as it defines character. Facebook is one of the most common social site used and with its service of timeline, a potential employer can have a look at your postings and picture updates from as early as when you started using the social site. You may have to restrict access to content or even better. Ensure that postings that are not relevant to your business are deleted. A bad impression can be made by such postings and cost you a potential client.
Finally, you should get people to access your online business profile as it increases the chance of a potential client accessing your work. Get a digital signature and link it with your postings on social media sites for people going through your postings to have access on reading your profile.
What you see is what you get. This is one the most outstanding thing that will be reflected from your online profile. Profile pictures should be captured right in sober mood and in the right attire. Avatars should strictly be a disregarded too as they tend to reflect you’re hiding something. You can also include a few professional photos of yourself or the business premises. Have a photographer take the photos and avoid making edits to the photos.
Author Bio:
As a business advisor and marketing manager for online businesses, the author has extensive experience and writes as a freelancer on essaypro.com where her essays have earned her top writers’ awards severally
Available link for download
Saturday, December 10, 2016
Creating a Home Email Server
Creating a Home Email Server
Dec 2012
Pictures got bumped from the blog move. Sorry.
Mar 2012
You might want to have your own email server because your paranoid, can’t stand the fact that free web email posts ads based on the contents of your email, or curiosity. For what ever your reasons this is how I made mine.
Things you’ll need prior.
- Purchase a domain of your choosing
- Static home IP
- Install Ubuntu 11.10 Server
Within your domain host you should locate where you can make edits to the DNS.
After locating this area we need to add a subdomain.
The subdomain should be mail.example.com. Obviously select your domain name.
Edit the mail.example.com subdomain DNS.
Make the DNS A record point to the static IP of you email server. Make the MX (mail exchange) record point to mail.example.com with a value of 10.
This could take some time to populate throughout their servers.
INSTALL UBUNTU SERVER
For the most part the install of Ubuntu Server was default and selecting the packages differed. I only installed OpenSSH and LAMP.
If you install the mail server it uses dovecot and I perfer courier.
After installing ubuntu server I then installed ubuntu-dekstop:
sudo apt-get install -y ubuntu-desktop
Its much easier to install the configuration files and follow along in the GUI.
After installing the ubuntu-desktop reboot and follow this walk through: http://www.pixelinx.com/2010/10/creating-a-mail-server-on-ubuntu-using-postfix-courier-ssltls-spamassassin-clamav-and-amavis
***TYPO*** When you get to 15-content-filter-mode its actually 15-content_filter_mode
After your completed there are some additional changes and additions to be made.
I added to the following lines to /etc/postfix/main.cf.
Locate the relayhost. The reason for this is to use an existing email account on your domain to send email out.
relayhost = [smtp.1and1.com]:587
Locate the #Encrypted authentication (SASL) and add the following:
smtp_sasl_auth_enable = yes
smtp_sasl_password_maps = hash:/etc/postfix/sasl_passwd
smtp_sasl_security_options = noanonymous
smtp_sasl_tls_security_options = noanonymous
Save /etc/postfix/main.cf
We need to add the relayhost login and password so that we can send mail through a SMTP server. The reason for using a host is that often home email servers get placed on an email blacklist and your email are lost. Its the host problem to ensure there email server dont end up on those lists. Change to your domain and port. The email address is normally used to authenticate through the relay. This email address and password can be set up through your domain.
echo [smtp.1and1.com]:587 mail@example.com:password” > /etc/postfix/sasl_passwdpostmap /etc/postfix/sasl_passwdAfter this I added an additional user to the mysql database mail.
Login to MySQL.
mysql -u root -pUSE mail;INSERT INTO `user` (`email`, `password`, `name`, `quota`, `enabled`) VALUES (USER@example.com‘, ENCRYPT(’changeme‘), ‘Administrator‘, NULL, 1);exit;Send this USER email from another source. This will populate the folders required to login.
INSTALL SQUIRRELMAIL
apt-get install -y squirrelmail squirrelmail-locales php-pear php5-cliSETUP APACHE
cp /etc/squirrelmail/apache.conf /etc/apache2/sites-available/squirrelmailln -s /etc/apache2/sites-available/squirrelmail /etc/apache2/sites-enabled/500-squirrelmaila2ensite squirrelmailapache2ctl -t/etc/init.d/amavis startSETUP SSL FOR APACHE (http://www.tc.umn.edu/~brams006/selfsign.html) and (http://www.tc.umn.edu/~brams006/selfsign_ubuntu.html)
openssl genrsa -des3 -out /etc/ssl/server.key 4096openssl req -new -key /etc/ssl/server.key -out /etc/ssl/server.csropenssl x509 -req -days 3650 -in /etc/ssl/server.csr -signkey /etc/ssl/server.key -out /etc/ssl/server.crtopenssl rsa -in /etc/ssl/server.key -out /etc/ssl/server.key.insecuremv /etc/ssl/server.key /etc/ssl/server.key.securemv /etc/ssl/server.key.insecure /etc/ssl/server.keymkdir /etc/apache2/sslcp /etc/ssl/server.key /etc/apache2/sslcp /etc/ssl/server.crt /etc/apache2/ssla2enmod sslln -s /etc/apache2/sites-available/default-ssl /etc/apache2/sites-enabled/000-default-sslecho "ServerName localhost" >> /etc/apache2/apache2.conf/etc/init.d/apache2 restartEDIT HOSTS
nano /etc/host127.0.0.1 localhost localhost.localdomain mail
127.0.1.1 mail
173.72.XXX.XXX mail.example.comSQUIRRELMAIL
cd /usr/share/squirrelmail/plugins/wget "http://www.squirrelmail.org/plugins/secure_login-1.4-1.2.8.tar.gz"tar xzvf secure_login-1.4-1.2.8.tar.gzcd secure_login/cp config.sample.php config.phpnano config.phpmodify;
$change_back_to_http_after_login = 1;to;
$change_back_to_http_after_login = 0;EDIT SQUIRRELMAIL
squirrelmail-configureDcourier8Locate secure_login and enter the number to enable.
SQAPACHE EDITS (https://help.ubuntu.com/community/EnablingUseOfApacheHtaccessFiles)
nano /vetc/apache2/sites-available/defaultFind;
<Directory /var/www/> Options Indexes FollowSymLinks MultiViews AllowOverride NoneModify;
AllowOverride AllSame for:
nano /vetc/apache2/sites-available/default-sslcd /var/wwwnano .htaccessADD:
# This allows you to redirect index.html to a specific subfolderRedirect /index.html https://mail.example.com/squirrelmail/Try logging into your email server:
http://mail.example.com
You should see the cert error and must accept the cert.
After that you should be able to login.
Might be able to add some additional configuration from here. http://flurdy.com/docs/postfix/
UPDATE 120319;
Recenting added the change_sqlpass plugin and that took and little figuring out. The screen will go blank and forces you to re-login with new password.
The config.php should have the following settings:
$csp_dsn = mysql://root:password@localhost/mail’;
$lookup_password_query = ‘SELECT count(*) FROM user WHERE email = “%1? AND password = %4?;
$password_update_queries = array(’UPDATE user SET password = %4 WHERE email = “%1?‘);
$force_change_password_check_query = ”;
$password_encryption = ‘MYSQLENCRYPT’;
$csp_salt_static = ‘LEFT(password, 2)’;
$csp_secure_port = 0;
$csp_non_standard_http_port = 0;
$min_password_length = 8;
$max_password_length = 0;
$include_digit_in_password = 1;
$include_uppercase_letter_in_password = 1;
$include_lowercase_letter_in_password = 1;
$include_nonalphanumeric_in_password = 0;
$csp_delimiter = ‘@’;
$csp_debug = 0;
Available link for download
Tuesday, November 29, 2016
Creating Windows 10 WinFE dual x64 x86 Boot Disc with MacBook Bitlocker Support Dell Servers
Creating Windows 10 WinFE dual x64 x86 Boot Disc with MacBook Bitlocker Support Dell Servers
Creating Windows 10 WinFE dual x64/x86 Boot Disc with MacBook, Bitlocker Support, Dell Servers
1. Install Windows AIK for Win8.1 and install or Windows 10 AIK. Default install is good.
2. Download Virtual Clone and install.
3. Open Deployment and Imaging Tools Environment command prompt as admin.

4. Traverse into the right directory.
cd ..
cd Windows Preinstallation Environment

5. Create the mount area.
x64
copype amd64 c:winfe_x64
x86
copype x86 c:winfe_x86

6. Mount the *.wim
x64
Dism /Mount-Wim /WimFile:c:winFE_x64mediasources oot.wim /index:1 /MountDir:c:winFE_x64mount
x86
Dism /Mount-Wim /WimFile:c:winFE_x86mediasources oot.wim /index:1 /MountDir:c:winFE_x86mount

7. Open regedit. Need to make sure the disc will not mount devices.


Win8.1 Win10
8. Highlight HKLM --> File --> Load Hive
9. Locate the SYSTEM hive file here: C:winfe_x64mountWindowsSystem32configSYSTEM
10. Call it winfe

11. Locate the following key HKLMwinFEControlSet001Servicesmountmgr –> Right click right panel and select New –> DWORD.
12. Name it NoAutoMount = 1

13. Modify HKLMwinFEControlSet001Servicespartmgrparameterssanpolicy = 3

14. Optional: HKLMwinFEControlSet001ControlFileSystemDisableDeleteNotification = 1

15. Highlight winFE. Select File –> Unload Hive… Confirm Close

16. Add more RAM capacity (512 / 256 / 128)
x64
Dism.exe /image:c:winfe_x64mount /Set-ScratchSpace:512
x86
Dism.exe /image:c:winfe_x86mount /Set-ScratchSpace:512

17. Add bootcamp drivers, driverpacks.net, specific drivers for hardware you are using like Adaptec, etc. This is assuming you put all the drivers you want to add under the c:drivers_x86 or c:drivers_x64 directory:

Bootcamp drivers I got from Apple: https://support.apple.com/kb/DL1837?viewlocale=en_US&locale=en_US
Driverpacks.net from: http://driverpacks.net
Driver Pack Solutions from: https://drp.su/index.htm
(fair warning some drivers cause blue screen of death...it will tell you which one caused...it helps to have a virtual environment to test the disk before burning...you will have to remove the offending .sys file from your driver directories)
Dell WinPE Driver (these drivers are necessary to get the mouse and keyboard working)
http://en.community.dell.com/techcenter/enterprise-client/w/wiki/2065.dell-driver-cab-files-for-enterprise-client-os-deployment
x64
dism.exe /image:c:winFE_x64mount /add-driver /driver:c:drivers_x64 /ForceUnsigned /recurse
x86
dism.exe /image:c:winFE_x86mount /add-driver /driver:c:drivers_x86 /ForceUnsigned /recurse

18. Add VBS support:
Win8.1
x64
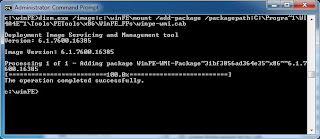
dism.exe /image:c:winFE_x64mount /add-package /packagepath:"C:Program Files (x86)Windows Kits8.1Assessment and Deployment KitWindows Preinstallation Environmentamd64WinPE_OCswinpe-wmi.cab"
dism.exe /image:c:winFE_x64mount /add-package /packagepath:"C:Program Files (x86)Windows Kits8.1Assessment and Deployment KitWindows Preinstallation Environmentamd64WinPE_OCsen-usWinPE-WMI_en-us.cab"
x86
dism.exe /image:c:winFE_x86mount /add-package /packagepath:"C:Program Files (x86)Windows Kits8.1Assessment and Deployment KitWindows Preinstallation Environmentx86WinPE_OCswinpe-wmi.cab"
dism.exe /image:c:winFE_x86mount /add-package /packagepath:"C:Program Files (x86)Windows Kits8.1Assessment and Deployment KitWindows Preinstallation Environmentx86WinPE_OCsen-usWinPE-WMI_en-us.cab"
Win10
x64
dism.exe /image:c:winFE_x64mount /add-package /packagepath:"C:Program Files (x86)Windows Kits10Assessment and Deployment KitWindows Preinstallation Environmentamd64WinPE_OCswinpe-wmi.cab"
dism.exe /image:c:winFE_x64mount /add-package /packagepath:"C:Program Files (x86)Windows Kits10Assessment and Deployment KitWindows Preinstallation Environmentamd64WinPE_OCsen-usWinPE-WMI_en-us.cab"
x86
dism.exe /image:c:winFE_x86mount /add-package /packagepath:"C:Program Files (x86)Windows Kits10Assessment and Deployment KitWindows Preinstallation Environmentx86WinPE_OCswinpe-wmi.cab"
dism.exe /image:c:winFE_x86mount /add-package /packagepath:"C:Program Files (x86)Windows Kits10Assessment and Deployment KitWindows Preinstallation Environmentx86WinPE_OCsen-usWinPE-WMI_en-us.cab"

19. Add HTA support:
Win8.1
x64
dism.exe /image:c:winFE_x64mount /add-package /packagepath:"C:Program Files (x86)Windows Kits8.1Assessment and Deployment KitWindows Preinstallation Environmentamd64WinPE_OCswinpe-hta.cab"
dism.exe /image:c:winFE_x64mount /add-package /packagepath:"C:Program Files (x86)Windows Kits8.1Assessment and Deployment KitWindows Preinstallation Environmentamd64WinPE_OCsen-uswinpe-hta_en-us.cab"
x86
dism.exe /image:c:winFE_x86mount /add-package /packagepath:"C:Program Files (x86)Windows Kits8.1Assessment and Deployment KitWindows Preinstallation Environmentx86WinPE_OCswinpe-hta.cab"
dism.exe /image:c:winFE_x86mount /add-package /packagepath:"C:Program Files (x86)Windows Kits8.1Assessment and Deployment KitWindows Preinstallation Environmentx86WinPE_OCsen-uswinpe-hta_en-us.cab"
Win10
x64
dism.exe /image:c:winFE_x64mount /add-package /packagepath:"C:Program Files (x86)Windows Kits10Assessment and Deployment KitWindows Preinstallation Environmentamd64WinPE_OCswinpe-hta.cab"
dism.exe /image:c:winFE_x64mount /add-package /packagepath:"C:Program Files (x86)Windows Kits10Assessment and Deployment KitWindows Preinstallation Environmentamd64WinPE_OCsen-uswinpe-hta_en-us.cab"
x86
dism.exe /image:c:winFE_x86mount /add-package /packagepath:"C:Program Files (x86)Windows Kits10Assessment and Deployment KitWindows Preinstallation Environmentx86WinPE_OCswinpe-hta.cab"
dism.exe /image:c:winFE_x86mount /add-package /packagepath:"C:Program Files (x86)Windows Kits10Assessment and Deployment KitWindows Preinstallation Environmentx86WinPE_OCsen-uswinpe-hta_en-us.cab"
20. Add scripting support:
Win8.1
x64
dism.exe /image:c:winFE_x64mount /add-package /packagepath:"C:Program Files (x86)Windows Kits8.1Assessment and Deployment KitWindows Preinstallation Environmentamd64WinPE_OCswinpe-scripting.cab"
dism.exe /image:c:winFE_x64mount /add-package /packagepath:"C:Program Files (x86)Windows Kits8.1Assessment and Deployment KitWindows Preinstallation Environmentamd64WinPE_OCsen-usWinPE-Scripting_en-us.cab"
x86
dism.exe /image:c:winFE_x86mount /add-package /packagepath:"C:Program Files (x86)Windows Kits8.1Assessment and Deployment KitWindows Preinstallation Environmentx86WinPE_OCswinpe-scripting.cab"
dism.exe /image:c:winFE_x86mount /add-package /packagepath:"C:Program Files (x86)Windows Kits8.1Assessment and Deployment KitWindows Preinstallation Environmentx86WinPE_OCsen-usWinPE-Scripting_en-us.cab"
Win10
x64
dism.exe /image:c:winFE_x64mount /add-package /packagepath:"C:Program Files (x86)Windows Kits10Assessment and Deployment KitWindows Preinstallation Environmentamd64WinPE_OCswinpe-scripting.cab"
dism.exe /image:c:winFE_x64mount /add-package /packagepath:"C:Program Files (x86)Windows Kits10Assessment and Deployment KitWindows Preinstallation Environmentamd64WinPE_OCsen-usWinPE-Scripting_en-us.cab"
x86
dism.exe /image:c:winFE_x86mount /add-package /packagepath:"C:Program Files (x86)Windows Kits10Assessment and Deployment KitWindows Preinstallation Environmentx86WinPE_OCswinpe-scripting.cab"
dism.exe /image:c:winFE_x86mount /add-package /packagepath:"C:Program Files (x86)Windows Kits10Assessment and Deployment KitWindows Preinstallation Environmentx86WinPE_OCsen-usWinPE-Scripting_en-us.cab"
21. Add powershell support
Win8.1
x64
dism.exe /image:c:winFE_x64mount /add-package /packagepath:"C:Program Files (x86)Windows Kits8.1Assessment and Deployment KitWindows Preinstallation Environmentamd64WinPE_OCsWinPE-PowerShell.cab"
dism.exe /image:c:winFE_x64mount /add-package /packagepath:"C:Program Files (x86)Windows Kits8.1Assessment and Deployment KitWindows Preinstallation Environmentamd64WinPE_OCsen-usWinPE-PowerShell_en-us.cab"
x86
dism.exe /image:c:winFE_x86mount /add-package /packagepath:"C:Program Files (x86)Windows Kits8.1Assessment and Deployment KitWindows Preinstallation Environmentx86WinPE_OCsWinPE-PowerShell.cab"
dism.exe /image:c:winFE_x86mount /add-package /packagepath:"C:Program Files (x86)Windows Kits8.1Assessment and Deployment KitWindows Preinstallation Environmentx86WinPE_OCsen-usWinPE-PowerShell_en-us.cab"
Win10
x64
dism.exe /image:c:winFE_x64mount /add-package /packagepath:"C:Program Files (x86)Windows Kits10Assessment and Deployment KitWindows Preinstallation Environmentamd64WinPE_OCsWinPE-PowerShell.cab"
dism.exe /image:c:winFE_x64mount /add-package /packagepath:"C:Program Files (x86)Windows Kits10Assessment and Deployment KitWindows Preinstallation Environmentamd64WinPE_OCsen-usWinPE-PowerShell_en-us.cab"
x86
dism.exe /image:c:winFE_x86mount /add-package /packagepath:"C:Program Files (x86)Windows Kits10Assessment and Deployment KitWindows Preinstallation Environmentx86WinPE_OCsWinPE-PowerShell.cab"
dism.exe /image:c:winFE_x86mount /add-package /packagepath:"C:Program Files (x86)Windows Kits10Assessment and Deployment KitWindows Preinstallation Environmentx86WinPE_OCsen-usWinPE-PowerShell_en-us.cab"
22. Optional; Add bitlocker support
Win8.1
x64
dism.exe /image:c:winFE_x64mount /add-package /packagepath:"C:Program Files (x86)Windows Kits8.1Assessment and Deployment KitWindows Preinstallation Environmentamd64WinPE_OCsWinPE-FMAPI.cab"
dism.exe /image:c:winFE_x64mount /add-package /packagepath:"C:Program Files (x86)Windows Kits8.1Assessment and Deployment KitWindows Preinstallation Environmentamd64WinPE_OCsWinPE-SecureStartup.cab"
dism.exe /image:c:winFE_x64mount /add-package /packagepath:"C:Program Files (x86)Windows Kits8.1Assessment and Deployment KitWindows Preinstallation Environmentamd64WinPE_OCsen-usWinPE-SecureStartup_en-us.cab"
dism.exe /image:c:winFE_x64mount /add-package /packagepath:"C:Program Files (x86)Windows Kits8.1Assessment and Deployment KitWindows Preinstallation Environmentamd64WinPE_OCsWinPE-EnhancedStorage.cab"
dism.exe /image:c:winFE_x64mount /add-package /packagepath:"C:Program Files (x86)Windows Kits8.1Assessment and Deployment KitWindows Preinstallation Environmentamd64WinPE_OCsen-usWinPE-EnhancedStorage_en-us.cab"
dism.exe /image:c:winFE_x64mount /add-package /packagepath:"C:Program Files (x86)Windows Kits8.1Assessment and Deployment KitWindows Preinstallation Environmentamd64WinPE_OCsWinPE-NetFx.cab"
dism.exe /image:c:winFE_x64mount /add-package /packagepath:"C:Program Files (x86)Windows Kits8.1Assessment and Deployment KitWindows Preinstallation Environmentamd64WinPE_OCsen-usWinPE-NetFx_en-us.cab"
x86
dism.exe /image:c:winFE_x86mount /add-package /packagepath:"C:Program Files (x86)Windows Kits8.1Assessment and Deployment KitWindows Preinstallation Environmentx86WinPE_OCsWinPE-FMAPI.cab"
dism.exe /image:c:winFE_x86mount /add-package /packagepath:"C:Program Files (x86)Windows Kits8.1Assessment and Deployment KitWindows Preinstallation Environmentx86WinPE_OCsWinPE-SecureStartup.cab"
dism.exe /image:c:winFE_x86mount /add-package /packagepath:"C:Program Files (x86)Windows Kits8.1Assessment and Deployment KitWindows Preinstallation Environmentx86WinPE_OCsen-usWinPE-SecureStartup_en-us.cab"
dism.exe /image:c:winFE_x86mount /add-package /packagepath:"C:Program Files (x86)Windows Kits8.1Assessment and Deployment KitWindows Preinstallation Environmentx86WinPE_OCsWinPE-EnhancedStorage.cab"
dism.exe /image:c:winFE_x86mount /add-package /packagepath:"C:Program Files (x86)Windows Kits8.1Assessment and Deployment KitWindows Preinstallation Environmentx86WinPE_OCsen-usWinPE-EnhancedStorage_en-us.cab"
dism.exe /image:c:winFE_x86mount /add-package /packagepath:"C:Program Files (x86)Windows Kits8.1Assessment and Deployment KitWindows Preinstallation Environmentx86WinPE_OCsWinPE-NetFx.cab"
dism.exe /image:c:winFE_x86mount /add-package /packagepath:"C:Program Files (x86)Windows Kits8.1Assessment and Deployment KitWindows Preinstallation Environmentx86WinPE_OCsen-usWinPE-NetFx_en-us.cab"
Win10
x64
dism.exe /image:c:winFE_x64mount /add-package /packagepath:"C:Program Files (x86)Windows Kits10Assessment and Deployment KitWindows Preinstallation Environmentamd64WinPE_OCsWinPE-FMAPI.cab"
dism.exe /image:c:winFE_x64mount /add-package /packagepath:"C:Program Files (x86)Windows Kits10Assessment and Deployment KitWindows Preinstallation Environmentamd64WinPE_OCsWinPE-SecureStartup.cab"
dism.exe /image:c:winFE_x64mount /add-package /packagepath:"C:Program Files (x86)Windows Kits10Assessment and Deployment KitWindows Preinstallation Environmentamd64WinPE_OCsen-usWinPE-SecureStartup_en-us.cab"
dism.exe /image:c:winFE_x64mount /add-package /packagepath:"C:Program Files (x86)Windows Kits10Assessment and Deployment KitWindows Preinstallation Environmentamd64WinPE_OCsWinPE-EnhancedStorage.cab"
dism.exe /image:c:winFE_x64mount /add-package /packagepath:"C:Program Files (x86)Windows Kits10Assessment and Deployment KitWindows Preinstallation Environmentamd64WinPE_OCsen-usWinPE-EnhancedStorage_en-us.cab"
dism.exe /image:c:winFE_x64mount /add-package /packagepath:"C:Program Files (x86)Windows Kits10Assessment and Deployment KitWindows Preinstallation Environmentamd64WinPE_OCsWinPE-NetFx.cab"
dism.exe /image:c:winFE_x64mount /add-package /packagepath:"C:Program Files (x86)Windows Kits10Assessment and Deployment KitWindows Preinstallation Environmentamd64WinPE_OCsen-usWinPE-NetFx_en-us.cab"
x86
dism.exe /image:c:winFE_x86mount /add-package /packagepath:"C:Program Files (x86)Windows Kits10Assessment and Deployment KitWindows Preinstallation Environmentx86WinPE_OCsWinPE-FMAPI.cab"
dism.exe /image:c:winFE_x86mount /add-package /packagepath:"C:Program Files (x86)Windows Kits10Assessment and Deployment KitWindows Preinstallation Environmentx86WinPE_OCsWinPE-SecureStartup.cab"
dism.exe /image:c:winFE_x86mount /add-package /packagepath:"C:Program Files (x86)Windows Kits10Assessment and Deployment KitWindows Preinstallation Environmentx86WinPE_OCsen-usWinPE-SecureStartup_en-us.cab"
dism.exe /image:c:winFE_x86mount /add-package /packagepath:"C:Program Files (x86)Windows Kits10Assessment and Deployment KitWindows Preinstallation Environmentx86WinPE_OCsWinPE-EnhancedStorage.cab"
dism.exe /image:c:winFE_x86mount /add-package /packagepath:"C:Program Files (x86)Windows Kits10Assessment and Deployment KitWindows Preinstallation Environmentx86WinPE_OCsen-usWinPE-EnhancedStorage_en-us.cab"
dism.exe /image:c:winFE_x86mount /add-package /packagepath:"C:Program Files (x86)Windows Kits10Assessment and Deployment KitWindows Preinstallation Environmentx86WinPE_OCsWinPE-NetFx.cab"
dism.exe /image:c:winFE_x86mount /add-package /packagepath:"C:Program Files (x86)Windows Kits10Assessment and Deployment KitWindows Preinstallation Environmentx86WinPE_OCsen-usWinPE-NetFx_en-us.cab"
23. Add tools
x86
Youll want to add tools before you commit the changes. You can add them inside the winfe_x86mount directory like such:

The pstart.exe is like a start menu found here: http://www.pegtop.net/start/
To get pstart.exe to auto load after boot user startnet.cmd inside winfe_x86mountwindowssystem32

x64
launcherBar_x64 like pstart.exe but for x64 here: http://www.lerup.com/LaunchBar/

Some of the x64 tools I installed:
7-zip = http://www.7-zip.org/a/7z1600-x64.exe
explorer++ = https://explorerplusplus.com/
hashmyfiles = http://www.nirsoft.net/utils/hash_my_files.html
irfanview = http://www.irfanview.com/64bit.htm
notepad2 = http://www.flos-freeware.ch/notepad2.html
sumatrapdf = http://www.sumatrapdfreader.org/download-free-pdf-viewer.html
vlc = https://download.videolan.org/pub/videolan/vlc/last/win64/
fshed64 = http://www.funduc.com/fshexedit.htm
24. cd c:
25. dismount and commit changes
x64
dism /unmount-wim /mountdir:c:winFE_x64mount /commit
x86
dism /unmount-wim /mountdir:c:winFE_x86mount /commit
26. remove bootfix.bin to remove hit any key to engage CD/DVD prompt
x64
del /f /q c:winFE_x64media oot ootfix.bin
x86
del /f /q c:winFE_x86media oot ootfix.bin
27. cd to make .iso or skip for USB after
x64
cd C:Program Files (x86)Windows Kits8.1Assessment and Deployment KitDeployment Toolsamd64Oscdimg
x86
cd C:Program Files (x86)Windows Kits8.1Assessment and Deployment KitDeployment Toolsx86Oscdimg
Win10
x64
cd C:Program Files (x86)Windows Kits10Assessment and Deployment KitDeployment Toolsamd64Oscdimg
x86
cd C:Program Files (x86)Windows Kits10Assessment and Deployment KitDeployment Toolsx86Oscdimg
28. make cd
x64
oscdimg -n -bc:winFE_x64fwfilesetfsboot.com c:winFE_x64media c:winFE_x64winFE_x64.iso
x86
oscdimg -n -bc:winFE_x86fwfilesetfsboot.com c:winFE_x86media c:winFE_x86winFE_x86.iso
-m to force if its over 700MB
29. Burn the iso to CD/DVD and boot it. Do some testing and determine that your disc does not mount or change your target system.
30. Make USB (F: is the drive letter of your USB thumb drive you wish to install WinFE on to)
x64
MakeWinPEMedia /UFD C:winFE_x64 F:
x86
MakeWinPEMedia /UFD C:winFE_x86 F:
31. If you choose to dual boot both x64 and x86 from one CD/DVD this is how you do it.
mkdir c:winfe_both
xcopy /Y /E /I c:winfe_x86fwfiles c:winfe_bothfwfiles
xcopy /Y /E /I c:winfe_x86media c:winfe_bothmedia
ren C:winfe_bothmediasources oot.wim boot_x86.wim
copy c:winfe_x64mediasources oot.wim c:winfe_bothmediasources oot_x64.wim
bcdedit /store C:winfe_bothmediaBootBCD /enum | find "osdevice"
Take note of the GUID and make sure you use yours if its different.
bcdedit /store C:winfe_bothmediaBootBCD /set {default} device ramdisk=[boot]sources oot_x86.wim,{7619dcc8-fafe-11d9-b411-000476eba25f}
Notice the subtle difference
bcdedit /store C:winfe_bothmediaBootBCD /set {default} osdevice ramdisk=[boot]sources oot_x86.wim,{7619dcc8-fafe-11d9-b411-000476eba25f}
bcdedit /store C:winfe_bothmediaBootBCD /set {default} description "WinFE 10 x86"
bcdedit /store C:winfe_bothmediaBootBCD /copy {default} /d "WinFE 10 x64"
note GUID

bcdedit /store C:winfe_bothmediaBootBCD /set {d3ccda44-1fc3-11e6-bddc-20c9d0b83e02} device ramdisk=[boot]sources oot_x64.wim,{7619dcc8-fafe-11d9-b411-000476eba25f}
bcdedit /store C:winfe_bothmediaBootBCD /set {d3ccda44-1fc3-11e6-bddc-20c9d0b83e02} osdevice ramdisk=[boot]sources oot_x64.wim,{7619dcc8-fafe-11d9-b411-000476eba25f}
bcdedit.exe /store C:winfe_bothmediaBootBCD /deletevalue {default} bootmenupolicy
Create the CD/DVD iso
MakeWinPEMedia /iso /f C:winfe_both C:winfe_bothWinFE-10-DualBoot.iso
Create USB
MakeWinPEMedia /ufd /f C:winfe_both F:

Available link for download
Wednesday, November 16, 2016
Creating WinFE Boot Disc
Creating WinFE Boot Disc
Dec 2011
Updated 4 Jan 2012
Updated Nov 2014
Creating a forensic bootable environment to run tools on a target system using WinPE.
1. Download Windows AIK iso. This file will aid in providing necessary files to create the winFE.
2. Mount Windows AIK file KB3AIK_EN.iso.
a. Use a .iso mounter like Virtual Clone drive. After installing right-click on the icon.

b. Mount the downloaded KB3AIK_EN.iso file.


4. Install Windows AIK Setup.

5. Default installation path.
6. Open Administrator command prompt. Right click command prompt and run as administrator.

7. Change directory in the PRTools area.
cd "c:Program FilesWindows AIKToolsPETools"

8. Copy the necessary files to your winFE creation area.
copype x86 c:winFE

9. Mount the bootable area.
Dism /Mount-Wim /WimFile:c:winFEwinpe.wim /index:1 /MountDir:c:winFEmount

10. Should see the mount area is populated.

11. Time to mod the registry so that the disc will not automount onboard drives. Open regedit. Start –> regedit.exe –> <enter>.

12. Highlight HKLM

13. Select File –> Load Hive …

14. Locate c:winFEmountWindowsSystem32configsystem –> Open

15. Name it “winFE”

16. Under HKLM should be winFE

17. Locate the following key HKLMwinFEControlSet001Servicesmountmgr –> Right click right panel and select New –> DWORD.

18. Name it NoAutoMount = 1

19. Modify HKLMwinFEControlSet001Servicespartmgrparameterssanpolicy = 3
***Some other people have also been using # 4 ***

***Additional item to change as OPTIONS ***
HKLMwinFEControlSet001ControlFileSystem /v DisableDeleteNotification /t REG_DWORD /d 1 /f
20. Highlight winFE

21. Select File –> Unload Hive… Confirm Close

22. Modify the wallpaper if you like. Name the BMP winpe.bmp and overwrite existing under c:winFEmountWindowsSystem32
23. Add directory tools under c:winFEmount

24. Drop tools like RegRipper, Cygwin, FTK Imager Lite, NetCat, Winrar unplugged, IrfanView, etc in this location.
Update 31 Dec 2012; I had to change from long file name to short for some reason even though I had the correct path. You might be able to use long file names with quotes starting at the "c:...winpe-wmi.cab". Short is what worked for me and I can only guess that it was something to do with the dism.exe program.
25. Add VBS scripting capability:
dism.exe /image:c:winFEmount /add-package /packagepath:C:Progra~1WI4A4E~1ToolsPEToolsx86WinPE_FPswinpe-wmi.cab
26. (Hint use the arrow up key in the keyboard and change wmi to hta) Add HTA:
dism.exe /image:c:winFEmount /add-package /packagepath:C:Progra~1WI4A4E~1ToolsPEToolsx86WinPE_FPswinpe-hta.cab

27. Add scripting:
dism.exe /image:c:winFEmount /add-package /packagepath:C:Progra~1WI4A4E~1ToolsPEToolsx86WinPE_FPswinpe-scripting.cab

28. Add .vbs scripts (props: http://praetorianprefect.com/archives/2010/04/winpe-3-0-forensics/) under tools.
***Additional item to modify would be to set the scratch space ***
Dism.exe /image:c:winfemount /Set-ScratchSpace:512
This would mean the system your booting requires at least 1GB RAM. You could modify to 256 and so on but 512 is the max. Most new systems these days have over 1GB RAM.
29. Add driver packs that way what ever system you come across should boot and see the onboard drives without issue. I have had issues in the past with Linux bootCDs that would not recognize hardware raids specifically SAS Dell blade servers. This winFE was able to see the hardware raid and image them without issue using the existing hardware. I extracted them to my c: drive root.
dism.exe /image:c:winFEmount /add-driver /driver:c:DP_MassStorage_wnt6-x86_1110 /recurse

30. I ran the following driver packs. The only reason you would need the LAN or WLAN is if you planned on using NetCat to maybe transfer and image file over the network. CardReader for high capacity drives to store images maybe. Chipset and MassStorage are the two most important. Download the latest and greatest.
a. DP_CardReaders_wnt6-x86_1104131. Closing the image. ***Make sure you close all related windows linked to c:winFE*** If you dont the image will not close properly.
b. DP_Chipset_wnt6-x86_11051
c. DP_LAN_wnt6-x86_1109
d. DP_MassStorage_wnt6-x86_1110
e. DP_WLAN_wnt6-x86_1104
32. Make sure your not in the command prompt c:winFE area when you issue the command.
cd c:
dism /unmount-wim /mountdir:c:winFEmount /commit
33. Should get a successful completion.
34. Copy file
copy c:winfewinpe.wim c:winfeisosources oot.wim /Y
35. Remove bootfix.bin so that you are not prompted to hit any key to boot from disc. This would be bad if we forgot and booted the operating system.
del /f /q c:winFEISO oot ootfix.bin
36. Create ISO
cd "c:Program FilesWindows AIKToolsx86"
oscdimg -n -bc:winFEetfsboot.com c:winFEISO c:winFEwinFE.iso
37. Should have your .iso file.
38. Dont forget to test it out…through vmware or live test system before using it within production.
39. To add additional tools, drivers, scripts etc start at step 9 and follow until creating the .iso.
Editing Existing WinFE
Continuation from the Creating WinFE Boot Disc
***WHILE TESTING ENSURE BIOS IS SET TO BOOT CD/DVD***
***ON REAL TARGETED SYSTEMS IT IS A GOOD PRACTICE TO DISCONNECT THE HARD DRIVE BEFORE CHANGING THE BIOS***
1. Edit the existing image.
Dism /Mount-Wim /WimFile:c:winFEwinpe.wim /index:1 /MountDir:c:winFEmount
***SPECIAL NOTE***
If you ever get this message because you failed to properly exit out of a mounted area of c:winFE utilize the following command:

dism /cleanup-wim
2. Should be able to see the mounted image under c:winFEmount
3. I would recommend creating a text document that runs through the diskpart commands if you plan on using diskpart to enable your storage device read/write capability.
4. Lets get the menu system up and running. Download PStart.
5. ***Optional*** I had a spare 4GB USB drive lying around and decided to use that and install PStart to. Reasoning was my attempt at keeping things in order. No other purpose other than that.
6. The winFE disc when booted will be “X:” so we will have to make sure when we install the programs we give it the right drive letter to run from.
7. ***Optional*** I installed PStart to my 4GB USB drive. If you have an SD drive that is fine too or use your OS c:. Additionally if you don’t have any issues with permissions you could just install right to c:winFEmount -or- c:winFEmount 0olz
8.***Optional*** I decided to change the drive letter of my 4GB USB drive to “x:” just like the winFE disk. This can be done under computer management.

9. Lets download Notepad++ portable and install to get it working in our winFE and PStart.
10. Install notepad++ and copy the contents to the winFE tools area

11. Start PStart by executing the .exe file. The window will appear but of course your menu screen will be blank. Right click in the blank area and select add group…

12. Call it Office or whatever.
13. Right click on the Office folder and select Add file…
14. Locate Notepad++Portable.exe under c:winFEmount oolsNotepad++Portable or where ever you installed it on the mounted winFE image and select open.

15. Change the application path to x:<where ever its installed in the winFE directory structure> –> OK
The icon shouldn’t appear because x: doesnt exist yet until winFE is run. Sometime a folder icon doesn’t appear also and that can be downloaded as well and added later. Its possible that without the x: could work also but havent tried.

16. This step can be repeated to add additional programs. If the purpose for winFE is to take forensic images it would be good to install FTK Imager Lite to the winFE tools area. Remember to copy c:windowssystem32oledlg.dll to c:winFEmountwindowssystem32 (Props to Brett Shavers)
When I added FTK Imager Lite I still had to add the following files.
c:windowssystem32avifil32.dll
c:windowssystem32msacm32.dll
c:windowssystem32msvfw32.dll
Also might want to load Colins Write Protect Application. This will aid in making hard drives online and writable like your storage device. Takes the place of diskpart. Update 4 Jan 13; dont know that its a full replacement for diskpart. Issue with Win7 installations is that a System Reserve partition is created by default of 100MB and when you tell WProtect to read-only and mount, it just mounts the first partition. This is only relevant if your thinking about using RegRipper to get information from it. Not an issue with FTK Imager because your probably imaging the physical drive anyway.
The other additional program I thought nice to have was an Explorer like program. I chose Explorer++.
17. Lets make PStart automatic when winFE starts.
18. Locate the file c:winFEmountwindowssystem32startnet.cmd
19. Edit the file with notepad or like program. Add the following line:
wpeinit
start x:PStart.exe
20. “start x:Pstart.exe” will execute the program to run and move on to the next command. Make sure your PStart location is correct under c:winFEmount.
21. Many automated other programs maybe run from this locations
22. When finished and if you used a thumb drive to organize your tools. Copy the root contents over to the root of c:winFEmount. Copy the t0olz contents if used to c:winFEmount 0olz
23. If you’ve finished adding additional programs lets complete the image. Make sure you exit out of any programs that are accessing c:winFE. This includes shutting Pstart off. It might be in your icon tray still active. If you make a mistake go back up to 1 to fix under special note.
dism /unmount-wim /mountdir:c:winFEmount /commit
24. Copy the boot image over.
copy c:winfewinpe.wim c:winfeisosources oot.wim /Y
25. I had an issue where oscdimg.exe could not be located. In case you come across this also its found under program fileswindows aik oolsx86
cd "c:Program FilesWindows AIKToolsx86"
oscdimg -n -bc:winFEetfsboot.com c:winFEISO c:winFEwinFE.iso
Received an error because the image exceeds the allowable space for a CD but not DVD. Change the command to:
***NOTE XX increment your .iso files created.***
oscdimg -m -n -bc:winFEetfsboot.com c:winFEISO c:winFEwinFEXX.iso
26. Boot using VMware etc or burn to DVD for testing.
Working with WinFE
This is a continuation from Editing Existing WinFE.
***ENSURE BIOS BOOTS FROM CD/DVD***
1. Attached a storage device to a target system that will be used to store your forensic image.
2. I attached a 64GB thumb drive to take a 60GB operating system hard drive. Just going to simulate.
3. Set the bios to boot from cd/dvd.
4. Started winFE. Since we told Pstart to load automatically it should have opened up. Your background will be different.

6. Open WProtect.exe

7. What you will notice is that the operating system hard drive appears as mounted and not read-only. From all I can tell this isnt the issue because we have taken Troys registry hacks to prevent this. To make sure we should set it properly. Highlight the OS drive and select dismount. Now select read-only.

8. Dont worry FTK Imager will still be able to see it.
9. Hopefully your storage device is already formatted. We need to make it writable. Select your storage device --> Read/Write --> Mount

10. Open Explorer++ and make sure you can see the storage device. Take note of the drive letter.

11. Now open FTK Imager. Add the OS drive.

12. Add the drive letter for the destination. Add an image file name.

13. Start the imaging

14. After FTK Imager verifies the image you can power off the system.
Available link for download
Subscribe to:
Posts (Atom)